Showing posts with label Baking and Desserts. Show all posts

C is for Christmas Cookie Cutter Crafts


We seem to have a lot of Christmas themed cookie cutters in our house.  How about yours?  More than any other theme our collection of trees, reindeer, stars and gingerbread people seems to grow all by itself.

So it seems a waste not to make use of this overload of festive cutters.  Here are 5 ways you and your kids can use your Christmas cookie cutters these holidays.  And they are not all cookie recipes!

Idea no. 1. For easy melted bead ornaments.  No need to carefully place the beads on the design trays before ironing to make a new ornament for the tree.  Follow these step by step instructions for Cookie Cutter Melty Bead Ornaments and make some really colourful, and sometimes interesting, designs like we did.

Christmas Cookie Cutter Crafts

Christmas Cookie Cutter Crafts
 
My favourite is the colourful star.  I love how it turned out.  I also like the tree.  The way the green beads curled when melted is pretty cool.

Christmas Cookie Cutter Crafts

Just remember to keep these cookie cutters for ornament making from now on.  Best to be safe and not use them for food again.

Idea no. 2. For homemade wrapping paper.  Dip the thicker edge of the cutters in some paint on a tray and stamp it all over large pieces of craft or butchers paper.  Cheaper and more personal than store bought gift wrap.  For ideas on how to make your own wrapping paper The Imagination Tree has this post on Cookie Cutter Wrapping Paper and Gift Tags while over at Nurture Store you can read about their Homemade Gift Wrap with Christmas Scented Paint.
Imagination tree wrapping paperNuturestore wrapping paper

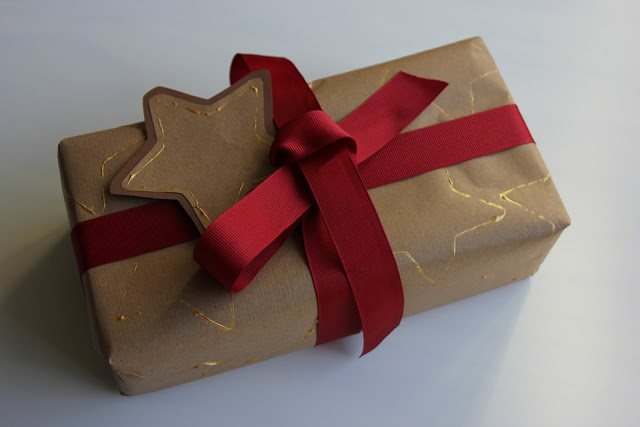
Idea no. 3. Salt dough ornaments/gift tags.  If you don't have any more room on your Christmas tree, turn salt dough ornaments into one of a kind gift tags.    Once baked and decorated you can write names and the year on the back of the ornaments and then use ribbon or string to tie them to the gifts.

An easy to follow post for making these ornaments is this one on Salt Dough Christmas Decorations from Be A Fun Mum

Be a fun mum

Red Ted Art used their Easy Salt Dough Recipe to make a gorgeous star garland.

Red Ted Art


Idea no. 4. Treats for your furry friends.  Make sure your pet dogs are in on the festive treats with these homemade dog biscuits.

Christmas Cookie Cutter Crafts


Idea no. 5.  For Christmas Cookies.  Of course I had to include one regular cooking activity.  This is a great way to keep the kids busy in the lead up to the Christmas break.  Get them to help make a big batch of sugar cookies and then let them loose with the icing and sprinkles.  These would make lovely packages for neighbours or elderly relatives. We used our recipe for a basic biscuit dough but you could use your own favourite sugar cookie recipe too.

Christmas Cookie Cutter Crafts

Christmas Cookie Cutter Crafts

Christmas Cookie Cutter Crafts

Christmas Cookie Cutter Crafts

For more ideas on crafts using cookie cutters have a look at our Pinterest board.


Wishing you a safe and happy Christmas from the three foot cooks!


H is for Hand Pies

H is for Hand Pies

What is a hand pie I hear you ask? Well maybe you already know.  I hadn't heard them called hand pies before.

Mini pies? Yes. Hand pies? No.

So in case you are in the dark like I was, hand pies are mini versions of regular pies. Easy to hold, very easy to eat and you get to enjoy the crispy pastry edges as well as the yummy filling.

At least that is what Bear and bee love best about hand pies.

H is for Hand Pies

We made hand pies a few weekends ago to share with family at a BBQ.  With the weather cooling down only a little and mostly at night time it is still nice enough to enjoy an outdoor barbie but now we can add the fun of a camp fire or brazier fire.  

Bear has desperately wanted to make pies this last week so these hand pies were the perfect solution for dessert.  We were able to customise the pies for each person by making small amounts of filling and then mixing and matching.  Bear was happy to work with apples and blueberries while Bee chose raspberries and strawberries.  I like to keep some frozen fruit in the freezer for use when the fresh versions are out of season so apart from the apple all the fruit we used for these pies was frozen.

For the fruit feel free to use whatever your family prefers. We peeled, cored and chopped an apple and mixed it with a teaspoon of brown sugar.  We also used frozen blueberries, and raspberries which we allowed to thaw a little.  The frozen strawberries were thawed slightly and chopped into smaller pieces.

H is for Hand Pies
Bear cutting apple for the pie filling.
H is for Hand Pies
Adding the brown sugar is optional.  A little rice malt syrup would work too.

You can use either ready made or homemade pastry.  We found both types worked well for this recipe. You might also like to try puff pastry for a flakier crust.

H is for Hand Pies

These pies are delicious served warm with custard or vanilla ice cream.  They would also be a nice addition to school (or work) lunchboxes.

If you would like to make hand pies with your children, here's what we did.

H is for Hand Pies

Fruit Hand Pies
Makes 6 approximately

Ingredients
2 sheets of ready made shortcrust pastry
OR
1 quantity of homemade shortcrust pastry

1 1/2 cups fruit, all one type or a mix
1/4 cup almond meal
1 egg, lightly beaten
cinnamon sugar for sprinkling on pies

Directions
1. Preheat oven to 200°C.
2. Line 2 baking trays with non-stick baking paper.

H is for Hand Pies
Waiting for the frozen strawberries to thaw.
3. Prepare the fruit for the filling.

H is for Hand Pies

4. Cut the pastry into 12cm x 8cm rectangle (or close to this to suit your pastry sheets).

H is for Hand Pies

5. Take one pastry rectangle and top it with a teaspoon of almond meal and some of the fruit. Make sure you leave a clean border around the edge of the pastry rectangle.

H is for Hand Pies

6. Place another pastry rectangle on top and press the edges together to seal.

H is for Hand Pies

7. Gently press the edges together with a fork.

8. Place the pie onto the prepared baking tray and cut 3 slices in the top of the pastry.

9. Repeat with the remaining pastry and filling.

H is for Hand Pies

10. Brush the top of each pie with the beaten egg.

H is for Hand Pies

11. Sprinkle a little cinnamon sugar over the pies.

H is for Hand Pies
The lighter pastry is the ready made version.

12. Bake in the oven for 15-20 minutes or until golden brown.

H is for Hand Pies


H is for Hand Pies


F is for Food Revolution Day 2015


I love Food Revolution Day and the aims of the movement. Unfortunately this year the three foot cooks and myself didn't get time to participate on the Friday. The girls' school had other celebrations planned for the day and by the time we got home we were all really tired.

Oat & Raisin Cookies

I didn't want to miss it completely though so we went ahead and made the Oat and Raisin cookies on the weekend. Jamie Oliver's original recipe is gluten free but since we don't have any food intolerances in our house we made the cookies using regular flour.
Oat & Raisin Cookies

If you like biscuits and cookies with oats in them you could also try our Anzac Biscuits recipe.
Oat & Raisin Cookies
Oat and Raisin Cookies
Original recipe Gluten Free Oat & Raisin Cookies from Food Revolution Day
Makes 25

Ingredients
100 grams unsalted butter
1/2 cup caster sugar
1/2 cup brown sugar
1 large egg, lightly beaten
1/4 cup milk
1 2/3 cup plain (all purpose) flour
1 teaspoon bicarb soda
1 teaspoon cinnamon
3/4 cup raisins
2 cups rolled oats

Directions
1. Preheat oven to 180ÂșC and line 2 baking trays with non stick baking paper.
2. Melt the butter in the microwave or in a small saucepan over a low heat.  Leave to cool for a few minutes.

Oat and Raisin Cookies

3. In a large bowl, mix together the sugars.

Oat and Raisin Cookies

4. Pour in the melted butter and stir well.

Oat and Raisin Cookies
Bear practising cracking eggs.

5. Add the egg and milk to the sugars and mix well.

Oat and Raisin Cookies

6. Sift the flour, bicarb soda and cinnamon into the bowl and stir to combine.

Oat and Raisin Cookies

7. Mix in the raisins and rolled oats.

Oat and Raisin Cookies

Oat and Raisin Cookies

8. Place heaped spoonfuls of the mixture onto the lined trays leaving a 4cm gap between each one.

Oat and Raisin Cookies

9. Flatten each biscuit slightly with your fingers.

10. Bake for about 15 minutes or until golden brown and crisp.

11. Transfer to a wire cooling rack and leave to cool.

Oat & Raisin Cookies

12. Enjoy for afternoon tea.

Oat & Raisin Cookies

Oat & Raisin Cookies


A is for Angel Cupcakes

Angel Cakes

With the festive season in full swing, it can be tempting to try and do everything bigger and better. Often, however, the simple ideas can be the best.

Take these Angel Cakes for example.  They are a simple combination of vanilla cupcakes, vanilla icing and icing sugar.  But they make for the perfect Christmas treat.

Angel Cakes

Most people would have heard of, and probably made, Butterfly Cakes.  All you need to do to make these super cute Angel Cakes is make a batch of your favourite cupcakes as you would for Butterfly Cakes and reposition the wings.

Angel Cakes

How wonderfully delightful are these Angel Cakes?
Angel Cakes

Here is how we made them.

Angel Cakes
Makes 12

Ingredients
For Cakes
120g unsalted butter
2/3 cup caster sugar
2 eggs
2 cups self raising flour
1 teaspoon vanilla extract
1/2 cup milk

For Icing
2 cups icing sugar mixture
2 tablespoons unsalted butter
2 tablespoons hot water
extra icing sugar for dusting

Directions
1. Preheat oven to 180°C.
2. Line a cupcake tray with paper liners
3. Beat butter and sugar until light and fluffy.
4. Mix in the vanilla.
5. Add eggs one at a time and beat well after each addition.
6. Add flour and milk and mix well.
7. Spoon batter evenly among paper cases.
8. Bake for 10-12 minutes.
9. Allow to cool for a few minutes in tray before placing on a wire rack to cool completely.

10. To make the icing, mix icing sugar and butter together in a medium bowl.
11. Add water and mix until a smooth paste forms.

Angel Cakes

12. To assemble the cakes, cut a disc from the top of each cake.

Angel Cakes

13. Fill the top of the cake with icing.

Angel Cakes

Angel Cakes

14. Cut the cake disc in half and gently stand each half upright in the icing to form wings.

Angel Cakes
15. Dust with icing sugar.

Angel Cakes