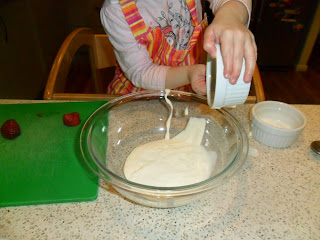
If you follow our blog, you would know that I have been a regular contributor over on Childhood 101.
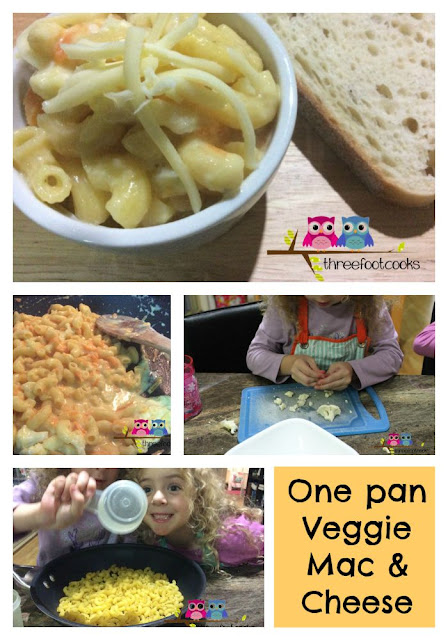
Here is my latest post on a reworked classic Family Dinner Idea - Vegetable Macaroni and Cheese. And the best part? It only takes one pan!
Click here to read the full post.
Showing posts with label Fruits and Vegies. Show all posts
Showing posts with label Fruits and Vegies. Show all posts
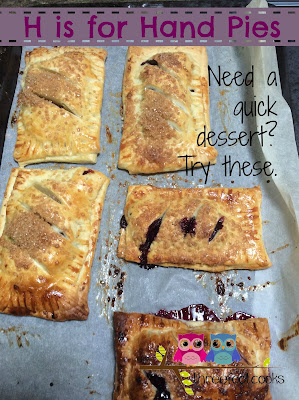
H is for Hand Pies
What is a hand pie I hear you ask? Well maybe you already know. I hadn't heard them called hand pies before.
Mini pies? Yes. Hand pies? No.
So in case you are in the dark like I was, hand pies are mini versions of regular pies. Easy to hold, very easy to eat and you get to enjoy the crispy pastry edges as well as the yummy filling.
At least that is what Bear and bee love best about hand pies.
We made hand pies a few weekends ago to share with family at a BBQ. With the weather cooling down only a little and mostly at night time it is still nice enough to enjoy an outdoor barbie but now we can add the fun of a camp fire or brazier fire.
Bear has desperately wanted to make pies this last week so these hand pies were the perfect solution for dessert. We were able to customise the pies for each person by making small amounts of filling and then mixing and matching. Bear was happy to work with apples and blueberries while Bee chose raspberries and strawberries. I like to keep some frozen fruit in the freezer for use when the fresh versions are out of season so apart from the apple all the fruit we used for these pies was frozen.
For the fruit feel free to use whatever your family prefers. We peeled, cored and chopped an apple and mixed it with a teaspoon of brown sugar. We also used frozen blueberries, and raspberries which we allowed to thaw a little. The frozen strawberries were thawed slightly and chopped into smaller pieces.
You can use either ready made or homemade pastry. We found both types worked well for this recipe. You might also like to try puff pastry for a flakier crust.
These pies are delicious served warm with custard or vanilla ice cream. They would also be a nice addition to school (or work) lunchboxes.
If you would like to make hand pies with your children, here's what we did.
Fruit Hand Pies
Makes 6 approximately
Ingredients
2 sheets of ready made shortcrust pastry
OR
1 quantity of homemade shortcrust pastry
1 1/2 cups fruit, all one type or a mix
1/4 cup almond meal
1 egg, lightly beaten
cinnamon sugar for sprinkling on pies
Directions
1. Preheat oven to 200°C.
2. Line 2 baking trays with non-stick baking paper.
3. Prepare the fruit for the filling.
4. Cut the pastry into 12cm x 8cm rectangle (or close to this to suit your pastry sheets).
5. Take one pastry rectangle and top it with a teaspoon of almond meal and some of the fruit. Make sure you leave a clean border around the edge of the pastry rectangle.
6. Place another pastry rectangle on top and press the edges together to seal.
7. Gently press the edges together with a fork.
8. Place the pie onto the prepared baking tray and cut 3 slices in the top of the pastry.
9. Repeat with the remaining pastry and filling.
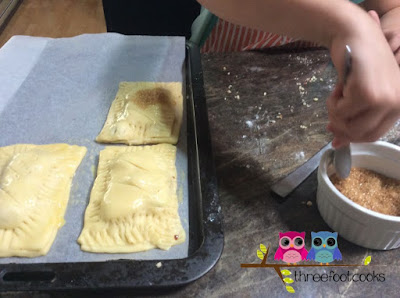
10. Brush the top of each pie with the beaten egg.
11. Sprinkle a little cinnamon sugar over the pies.
12. Bake in the oven for 15-20 minutes or until golden brown.
For the fruit feel free to use whatever your family prefers. We peeled, cored and chopped an apple and mixed it with a teaspoon of brown sugar. We also used frozen blueberries, and raspberries which we allowed to thaw a little. The frozen strawberries were thawed slightly and chopped into smaller pieces.
 |
| Bear cutting apple for the pie filling. |
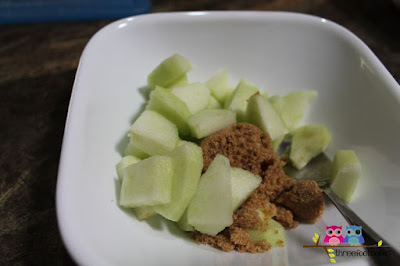 |
| Adding the brown sugar is optional. A little rice malt syrup would work too. |
You can use either ready made or homemade pastry. We found both types worked well for this recipe. You might also like to try puff pastry for a flakier crust.
These pies are delicious served warm with custard or vanilla ice cream. They would also be a nice addition to school (or work) lunchboxes.
If you would like to make hand pies with your children, here's what we did.
Fruit Hand Pies
Makes 6 approximately
Ingredients
2 sheets of ready made shortcrust pastry
OR
1 quantity of homemade shortcrust pastry
1 1/2 cups fruit, all one type or a mix
1/4 cup almond meal
1 egg, lightly beaten
cinnamon sugar for sprinkling on pies
Directions
1. Preheat oven to 200°C.
2. Line 2 baking trays with non-stick baking paper.
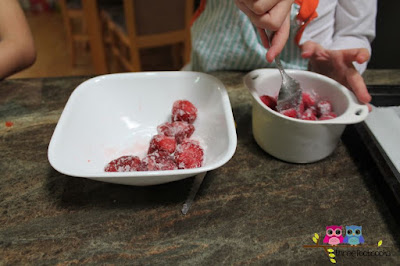 |
| Waiting for the frozen strawberries to thaw. |
4. Cut the pastry into 12cm x 8cm rectangle (or close to this to suit your pastry sheets).
5. Take one pastry rectangle and top it with a teaspoon of almond meal and some of the fruit. Make sure you leave a clean border around the edge of the pastry rectangle.
6. Place another pastry rectangle on top and press the edges together to seal.
7. Gently press the edges together with a fork.
8. Place the pie onto the prepared baking tray and cut 3 slices in the top of the pastry.
9. Repeat with the remaining pastry and filling.
10. Brush the top of each pie with the beaten egg.
11. Sprinkle a little cinnamon sugar over the pies.
 |
| The lighter pastry is the ready made version. |
12. Bake in the oven for 15-20 minutes or until golden brown.
P is for Pumpkin Sugar Cookies
These Pumpkin Sugar Cookies are Boo-tiful (sorry couldn't miss the opportunity!). If you are looking for a simple Halloween or Autumn treat that the kids can help with, then try these.
The pumpkin flavour is subtle so even your fussiest eaters should be happy with these cookies. I deliberately kept the spices to a minimum to suit Bear's and Bee's tastes. You might like to use a little more cinnamon or add some nutmeg too.
The colour of the dough will be paler after baking so you may want to add a few drops of orange food colouring to enhance the pumpkin-y-ness of the baked cookies.
For this recipe I adapted the Basic Sugar Cookie recipe from Martha Stewart.
 |
| Bear cutting out shapes. |
 |
| Bear decorating cooled cookies. |
Pumpkin Sugar Cookies
Makes approximately 30 depending on size of cookies.Ingredients
3 cups plain (all purpose) flour, plus extra for rolling
1/2 teaspoon baking powder
1/4 teaspoon salt
1/4 teaspoon cinnamon
1/2 cup (113g) unsalted butter, softened
1 (220g) cup sugar
1 large egg
1 teaspoon vanilla extract
1/2 cup pumpkin puree
Icing in various colours to decorate
Directions
1. In a large bowl, stir together flour, baking powder, salt and cinnamon.
2. Use an electric mixer to cream butter and sugar until light and fluffy.
3. Beat in egg and vanilla.
4. Add pumpkin puree and mix well.
5. With the mixer on low speed, gradually add flour mixture.
6. Mix until combined.
7. Divide dough in half and flatten into disks.
8. Wrap each disk in plastic wrap and freeze until firm.
9. Preheat oven to 160°C and line 2 baking trays with non-stick baking paper.
10. Remove one disk of dough from freezer and let stand for 5 minutes.
11. On a floured surface, roll out dough to approx 0.5 cm.
12. Cut out shapes with cookie cutters. Make sure you dip the cutters in flour to help stop them sticking.
13. Use a spatula to transfer the shapes to a prepared tray.
14. Reroll dough scraps and cut more shapes.
15. Repeat with remaining dough.
16. Bake until edges are golden. Depending on the size of the cookies this should take 10-18 minutes.
17. Cool cookies on a wire rack before decorating with icing.
You can download a printable recipe card for this recipe from here.
V is for Vegetable Printing
Bear and Bee did some vegetable printing today. Bee had seen this activity on television and was keen to try it out. As today is a non kindy day it was the perfect time to do it.
Vegetable printing requires very little preparation but can be messy so make sure you put plenty of paper , or a plastic sheet, over the table where you are working.
All you will need for Vegetable printing is a selection of vegetables, some paint on a tray and paper to print on. If you would like more detailed instructions with photos have a look at this post on Garden Vegetable Printing over at No Time For Flash Cards (one of my favourite sites).
This activity is great for learning the names of different vegetables as well as looking at how different each one is on the inside.
Next time we will try using fruits like apples and pears for printing like these Apple Prints over at Modern Parents Messy Kids.
O is for Organic Fruit and Vegetables
Today we picked up our first box of organic fruits and vegetables. Not that we haven't had organic before but this is a mystery box. A box that we have no control over what is in it - just the cost. A local company has started putting together boxes of seasonal organic fruit and vegetables that you order and pay for over the Internet and then pick up from a designated location.
Apart from the health and environmental benefits of eating organic I am excited about having to use fruits and vegetables that we don't normally buy. When we do the grocery shop we tend to stick to fruits and vegetables that we know we like such as carrots, potatoes, broccoli, apples, bananas and watermelon.
This box we got cauliflower, silver beet as new veggies to try. I am thinking cauliflower macaroni cheese and spinach and feta pie. We also got some lovely oranges which I plan to use in a fresh orange cake. Keep an eye on our blog to see how these recipes go.
As an added bonus I can order freshly baked sourdough breads from a bakery a little further up the coast and that gets included with the box.
While we won't be getting a box every week (cost is a big factor in our limited weekly budget) I am planning on getting one every 3 or 4 weeks so make sure you check back regularly to see what new fruit and veggies and recipes we have added to our regular diet.
E is for Eating A Rainbow Every Day
I must confess that Bee and Bear don't eat as healthily as I would like them too. I guess that is true of a lot of 3 year olds. But so far, no matter what I try, they are very picky about what they will eat. Actually it's more to do with what they'll eat mixed together ie they'll eat spaghetti on one side of the plate and meatballs on the other but not spaghetti and meatballs mixed together. But that's another post.
One of the areas I have resolved to work on is the variety of fruits and vegetables both Bear and Bee will eat and how many serves they eat every day. This is something that I believe we will have some success with. Bee favours vegetables and Bear favours fruits and while they eat a reasonable variety I need to work on them trying new types. Especially on alternatives for their favourites such as strawberries which are out of season here and thus more expensive than say stone fruit.
To help us out we borrowed Eating the Rainbow by Rena D. Grossman from the library today.
If you would like to purchase a copy of this book, please visit my Fishpond Affiliate space by clicking on this image.
This is a simple board book giving examples of fruits and vegetables that fit each colour of the rainbow. I plan to use this as a springboard for discussion on what fruits and vegetables we could try and for identifying any Bee and Bear don't recognise. Already Bee has started looking at the pictures and naming the ones she does know.
 |
| Bee's favourite page - Pink! |
I have also taken inspiration from a number of sites found on the net and on Pinterest. I have pinned some activities and recipes I would like to try. So far my favourites are
Eating a Rainbow - Two fun activities for kids from toddlerapproved.com
Eat your Rainbow from inner child food
Eat a Rainbow Salad from sweet potato chronicles
I am also going to create a rainbow reward chart for Bear and Bee to use to keep track of their progress. They are keen on stickers so hopefully this will be enough of an incentive. I will post a link to a printable version of the chart when it is ready.
Do you encourage your child to eat a rainbow everyday? What has worked?
S is for Strawberry Muffins
After visiting the Strawberry Fair recently, we had lots of
fresh strawberries to snack on. Once a
few days had passed however they were beginning to be a little past their prime
so I decided to make some Strawberry Muffins with Bear and Bee. We usually stick to our standard playlist of
muffins flavours (choc chip and banana) so this was new territory.
At the fair we were given a ‘Cooking with Strawberries’
leaflet. I adapted the recipe from that leaflet for our muffins. It is a great recipe for cooking with
children. Apart from putting the muffins
in the oven and taking them out, your child can help with all the steps. Placing the paper cases in the muffin tray (a
good opportunity to practice counting), chopping the strawberries, mixing the
ingredients, spooning the muffin mix into the cases and sprinkling on the
topping are all steps that your child can help with or do with your
supervision.
This is what we did:
Ingredients
½ cup milk
¼ cup vegetable oil
2 large eggs
2 cups self-raising flour (you could use 2 cups all-purpose
flour and 2 teaspoons of baking powder)
1 cup of chopped strawberries
1 cup raw sugar
1 cup rolled oats
½ cup packed brown sugar
2 tablespoons butter, melted
Method
Preheat the oven to 200oC.
Line a 12 hole muffin tray with paper cases.
 | ||||
| Oh no! Too many paper cases. |
Combine the milk, oil and eggs in a large bowl.
 |
| Bee carefully adding the oil. |
Stir in the flour, strawberries and raw
sugar.
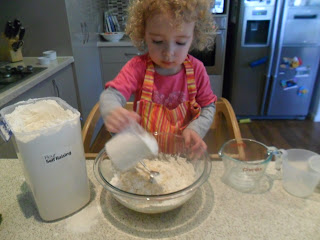 |
| Bee has started practicing her measuring skills with the flour. |
 |
| Bee mixing in the chopped strawberries |
Mix until just combined. It is important not to overmix muffins as
they become tough. Don’t worry if the
mix is a little lumpy. It will work out
in the end.
In a small bowl mix together the oats, brown sugar and
melted butter to make a topping for the muffins. Try to stop your child eating all the topping
before it goes onto the muffins!
 |
| Bear came back to help make the topping. |
 |
| But its really good mum! Eating the oaty topping for the muffins |
Spoon the muffin mix evenly into the muffin tray and
sprinkle on the oats topping. Remind your
child again that the topping is for the muffins not solely for them to
eat. (In all fairness it does taste
really good so I can’t blame them.)
 |
| Spooning on what is left of the topping. |
Bake the muffins for 15-20 minutes. Muffins are cooked when they spring back
after being lightly touched in the centre.
Cool on a wire rack and enjoy.
 |
| Bee and Bear enjoying their strawberry muffins |
This is a great recipe for kids. I hope you enjoy them as
much as we did. We will definitely be
making these a few more times before strawberry season is over. I might even have to freeze some strawberries
so we can make them later in the year too.
 |
| Delicious!! |
What is your favourite strawberry recipe to cook with your
child?
O is for Olympics Dessert
With the Olympics being held in the UK at the moment I
decided to make the British dessert, Eton Mess, with Bear and Bee. It was an opportunity to use some of the
beautiful strawberries we got from the Strawberry Fair last weekend as well as
combining two of my favourite ingredients, meringues and cream as well as being a great
recipe for kids.
As you will see from the photos, Bee was left to cook this
by herself (with my help obviously) with Bear having decided that she’d rather
spend time with her dad. So I took this
opportunity to just guide Bee through each of the steps and let her do them
herself (I had already premade the raspberry sauce). And I am so glad I did. She
was so proud of her efforts and couldn’t wait to serve the results to her dad
and her sister.
The only downside to this plan was that the dessert looked
nothing like Eton Mess (well maybe a melted version of one). Bee was very enthusiastic with her mixing and
loves the colour pink. So when she added the raspberry sauce to the cream and
yoghurt and saw that it was turning pink she didn’t want to stop mixing. The end result still tasted really good.
The basic recipe for Eton Mess I got from here. There are lots of different versions out there so feel free to change it. Instead of meringue nests I used mini
meringues. They were too difficult for
Bee to crush so she just put them in whole.
Which was fine as they were bite sized anyway. I didn’t bother putting
the raspberry sauce through the food processor either, I just pushed it through
a sieve with the back of a spoon.
This is such a good recipe for kids. There is no heat involved if you pre make the
sauce. Or you could use a store bought raspberry sauce instead. The steps are simple enough for kids to do by
themselves and the results look impressive. There is also a good balance of
fruit/yoghurt and meringue/cream so you don’t have to stop the kids (or
yourself) having seconds.
S is for Strawberry Fair
Last weekend we went to a Strawberry Fair in a nearby
town. It was a perfect day out – quality
time spent as a family, great weather, good food and entertainment and plenty
of interesting things to look at. Bear
and Bee had a wonderful time and couldn’t wait to get stuck into the punnets of
strawberries that we had purchased. We
held out until the car trip home and it was worth the wait. They were the best strawberries we have eaten
this season – not too big, just sweet enough, juicy and tasting just like
strawberries. Bear was prepared to
disregard my warning of not eating too many in case she got a tummy ache so in
the end I had to pretend that the box was finished and hide the evidence.
We got lots of ideas for strawberry recipes for kids from
the fair too. The strawberries kebabs
(fresh strawberries threaded on a bamboo skewer) dipped in melted chocolate
looked divine but Bear and Bee aren’t too keen on chocolate so I will have to keep
that idea for dessert for hubby and me.
We will try making a batch of strawberry muffins this week and perhaps
some strawberry ice blocks if the weather stays warm so keep a watch on
upcoming posts to find out what we make.
Going to a fair like this is a good opportunity for children
to see that food can come from places other than a supermarket. I hope to take Bear and Bee to a strawberry
farm before the end of the season this year so they can pick their own and see
how they are grown. We have our own
strawberry plants in the garden from which we have picked a handful of berries
this year but they haven’t been too successful.
Food and eating should be a social activity too so it was
good for Bear and Bee to see and be a part of large groups of people sitting
together and enjoying food and community.
 |
| Bee showing off her purchase at the fair (it was strawberry hair clips). |
Have you taken your child to a food-based community
event? What was it like?
Subscribe to:
Posts (Atom)

