If you follow our blog, you would know that I have been a regular contributor over on Childhood 101.
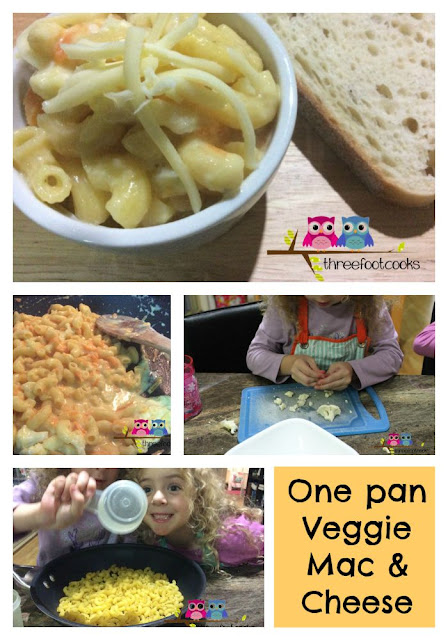
Here is my latest post on a reworked classic Family Dinner Idea - Vegetable Macaroni and Cheese. And the best part? It only takes one pan!
Click here to read the full post.
Showing posts with label dinner. Show all posts
Showing posts with label dinner. Show all posts
G is for Gone Playing Back Soon
You may have noticed that things have been very quiet here over the last few months. I have been taking some time off to work on some projects as well as work out what I wanted to do, if anything, with this blog.
I haven't been completely out of touch though. While taking a break I still did some guest posting. Click on the links below to see what we did.
Over on Childhood 101 you can read about our Chicken Pot Pies.
And on Creative World with Varya we made some Macadamia Anzac Biscuits.
Hopefully you will be pleased to know that the threefootcooks blog will continue - just at a slightly more casual pace. I found that working on this blog was taking over and I didn't have any time for the other things I enjoy doing such as sewing and diy projects.
I will still be writing and posting about new recipes and other food related projects that Bear, Bee and myself have tried but it may only be once or twice per week. I hope you will stick around and will enjoy this more lesiurely pace.
If you have any suggestions or feedback please leave a comment.
M is for More Meatballs
Aaah meatballs. They are certainly a good thing but are often underrated. Meatballs are so versatile, think pasta, noodles and even soup. And most children, including Bear and Bee, are happy to eat them. I like to make ours on the smaller side so there is more of them and the girls find them easier to eat that way.
This recipe for Chinese flavoured meatballs and vegetable noodles is a favourite in our family. The original inspiration for this dish came from this meatballs recipe on the taste.com.au site. I have adapted it slightly to suit our family's tastes. We used capsicum and broccolini as that is what we had available. You could also try bok choy, green beans, mushrooms, thinly sliced carrot or Chinese cabbage.
Chinese meatballs with stir fry vegie noodles
Download the recipe card here.
Serves 4
Ingredients
1/2 cup hoisin sauce
1 tablespoon low salt soy sauce
1 teaspoon crushed garlic
1 teaspoon grated ginger
500g mince (beef, pork or chicken)
1/2 cup fresh breadcrumbs
1 pkt thin egg style noodles, shelf ready
2 tablespoons vegetable oil
1 medium red capsicum, thinly sliced or diced
1 bunch broccolini (baby broccoli)
Directions
1. Mix sauces, garlic and ginger together in a small bowl.
2. Mix together the mince, egg, breadcrumbs and 2 tablespoons of the sauce mixture in a large bowl. You will find it easier to do this by hand.
3. Take rounded teaspoons of the mince mixture and shape into balls.
4. Prepare noodles according to the directions on the packet.
5. Meanwhile, heat half the oil in a large frying pan over medium heat and cook meatballs for 6 to 8 minutes to until cooked through. Drain meatballs on a plate lined with paper towel.
6. Heat remaining oil in cleaned frypan or in a wok over high heat and stir fry capsicum and broccolini for 2 minutes. Add noddles and remaining sauce mixtures and stir fry for 2 minutes or until heated through. You may need to add 2 tablespoons of water to keep the sauce liquid enough. Toss through the meatballs and serve.
What's your favourite way of serving meatballs for your family?
F is for Fish Fingers for The Kids Cook Monday
Fish is such a good food to include in your child’s diet. One of my daughters’ favourite ways to eat fish at the moment is fish fingers. They both request them a number of times during the week for lunch and dinner. Not that we have them that often.
To take advantage of this new found liking, I decided to get Bear and Bee to help me make Homemade Fish Fingers for dinner. I prefer to shallow fry the fish fingers in a small amount of canola oil to make them super crispy on the outside but if you would like a healthier option I would suggest spraying them with olive oil spray and baking in the oven at 180oC for 15 minutes.
Homemade Fish Fingers
½ cup plain flour
¼ cup reduced-fat milk
1 egg, lightly beaten
2 cups fresh wholemeal breadcrumbs
400 grams firm while fish fillets, cut into 1-2 cm
thick slices
Canola oil for frying
Directions
1. Place the flour on a dinner plate.
2. Mix the milk and egg together in a shallow bowl.
4. Roll 1 piece of fish in the flour and shake gently
to remove any excess.
 |
| Dip the fish fingers into the egg mix. |
 |
| Carefully roll the fish fingers in the breadcrumbs. |
5. Dip the fish into the egg mix and then roll in the
breadcrumbs. Place the coated fish
finger on a clean plate and repeat steps 4 and 5 with the remaining fish pieces.
 |
| Fish fingers ready to cook. |
6. Heat 2-3 tablespoons of oil in a large frying pan over medium high heat.
7. Carefully place half of the fish fingers in the oil
and fry until golden brown and cooked through.
Depending on how thick you cut the fish fingers this should be about 3-4
minutes per side.
8. Remove the fish fingers when cooked and place on a
tray lined with paper towel. Keep warm.
A is for Asian Salad
While the weather is cooling down a little here in North Queensland we don't really get a winter. Sure the thermometer can hit the low teens during the night but it's not really cold. It's cold enough for soups and stews but not too cold to enjoy a great salad. I have been seeing a lot of great salads on blogs in my feedly feed at the moment - a result of the warmer weather in the northern hemisphere I guess.
This BBQ Chicken Asian Salad recipe from Wendy at Vegie Smugglers is a great salad. Light, refreshing and easy to pull together. Everything you need in a busy weeknight dinner recipe. There's lots of opportunities for the kids to help too and you might even get them to try a new vegetable.
BBQ Chicken Asian Salad
Click here to see the full recipe on the Vegie Smugglers blog. |
| Bear washing the vegetables for the salad. |
 |
| Bear chopping up the beans using scissors. |
 |
| Bee helped by juicing the lime. A tricky motor skill that needs practise. |
 |
| Mixing the dressing in a bottle. |
 |
| We added chopped peanuts and crunchy noodles for extra crunch. |
Feel free to swap the vegetables for ones your family likes. We added strips of red capsicum as Bee has started eating it.
F is for Falafel Burgers for The Kids Cook Monday
I am making an effort to include a least 1 vegetarian dinner meal and 1 fish dinner meal in our weekly menu plan. We already eat a fairly healthy diet, with everything in moderation but there is room for improvement. Eating less meat based protein and more fish and seafood is one goal I am going to work on for this year.
For dinner tonight, Bee helped me make Falafel Burgers. The original recipe can be found here on the Vegie Smugglers blog. Wendy Blume, the author of Vegie Smugglers, has some fantastic recipes and great ideas for including more vegetables in meals everyday.
Falafel Burgers
Makes 8
Go here for the recipe in full.
I made some slight changes to the recipe to suit our family's tastes. I left out the ground coriander and the parsley. I didn't want the flavours to be too strong as Bear and Bee have started trying out new foods more often. I left out the parsley so there wasn't any green bits for the same reason.
 |
| Bee breaking up the bread for breadcrumbs. |
 |
| Falafel mix |
Instead of making 8 full sized patties I made 6 patties and 8 mini patties. Bear and Bee are more likely to try something if it is a smaller version. Hence, lately I have been making lots of mini meatballs, mini patties and mini most things.
 |
| 8 large patties before 2 were divided up to make 8 mini patties. |
The original recipe calls for the patties to be baked in the oven. I fried our patties in a large frying pan over medium high heat with a tiny amount of olive oil. I wanted to serve our burgers with oven baked chips and found it easier to leave the chips to do their thing in the oven while I cooked the burger patties in the pan.
 |
| Mini Falafel Burger |
To my surprise (and delight) both Bear and Bee tried their mini burgers without any fuss and hubby actually went back for seconds. They were delicious and I will be making them a regular dish in our monthly meal plans.
 |
| Falafel Burger and Oven baked chips. |
H is for Homemade Pizza for The Kids Cook Monday
***I have been updating the layout of some of my old posts and some how this one has published as a new post rather than just updating the old version. Hope you enjoy this blast from the past!**
This week the threefootcooks, hubby and myself are travelling to visit relatives for Christmas so I thought it would be the perfect opportunity to repost a family dinner favourite.
Homemade Pizza is a perfect dish to cook with kids and with most school kids in Australia now (or very soon) on holidays it is a great draw card to get the whole family cooking together.
You may find your kids eating more veggies than they normally do because they are on top of a pizza and covered with cheese.
I like to make my own pizza sauce using home grown tomatoes. I sauté onion and garlic in a large saucepan until the onion has softened then add the chopped tomatoes, a small amount of red wine and some fresh herbs like basil and oregano.
Pizza night has been a staple in the threefootcooks household for as long as I can remember (long before the three foot cooks came along). Lately, however, we have been making our own rather than buying takeaway pizzas. Cost and nutrition are the main factors in choosing to make our own pizzas. As well as these factors, Bear and Bee are able to make the pizza bases and prepare the toppings.
Hubby received a benchtop pizza oven as a present last Christmas and it is the bomb! I was dubious at first. I was sure we could make pizzas that were just as good in the regular oven. But I was wrong. The pizzas out of the pizza oven are tastier, crispier and faster to cook.
To make our homemade pizzas I use the Pizza and Focaccia mix by Laucke for the bases (no I’m not being paid to say this, I just think it’s a really great product). There are lots of different pre-mix pizza base flours on the market that you could use, or you could purchase ready-made pizza bases.
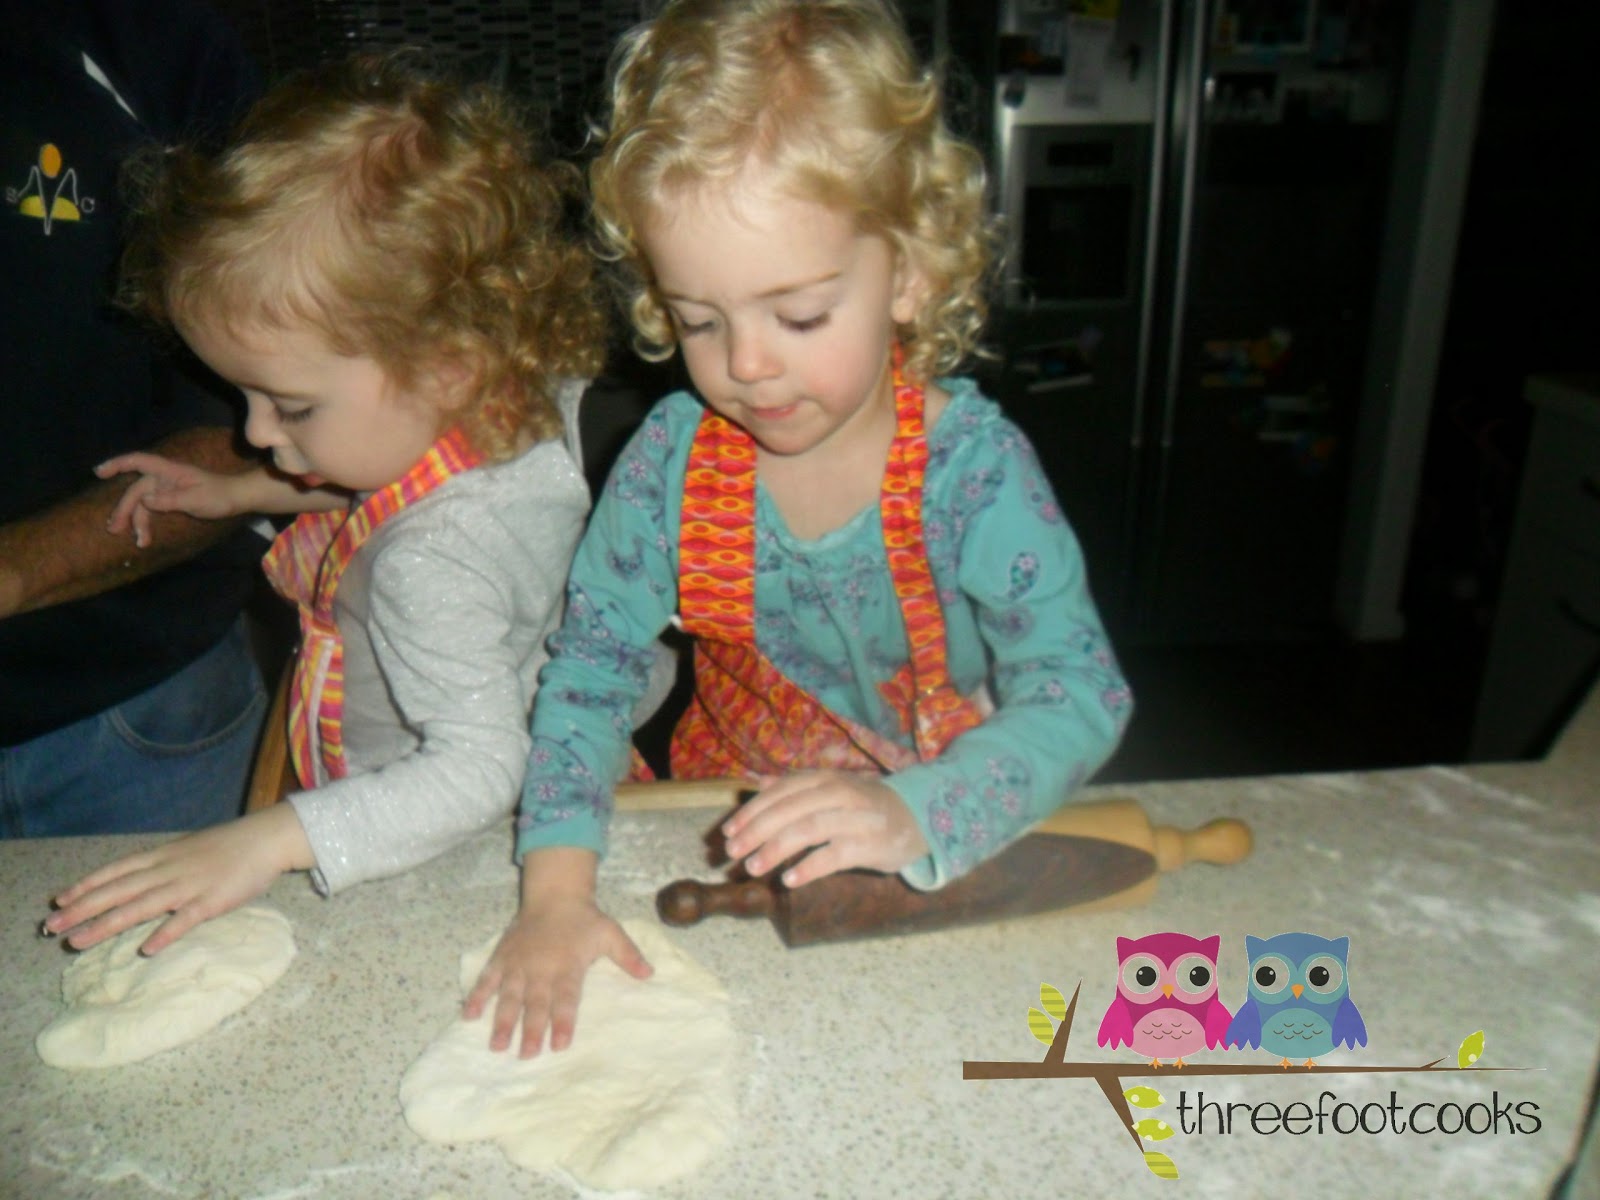
For the first stage of preparing the pizza dough I use my electric mixer with the dough hook attachment. If you want to knead it by hand this is a skill you could involve your child in. I wait until the dough has rested for the first time and needs to be kneaded a little ready for more resting to get Bear and Bee involved. That way it doesn’t affect the final product too much if they don’t knead it enough.
 |
| Bee helping to knead the pizza dough |
While the dough is going through its final resting stage, Bear and Bee help prepare the pizza toppings. You can start with this step if you are using ready-made pizza bases.
 |
| Bee cutting up our homegrown tomatoes for the pizza. |
Pizza is a great recipe for children to help with as most of the toppings are easy enough to chop up with a table knife. They can even help grate the cheese if you have a rotary cheese grater. I wouldn’t recommend letting them use a box grater until they are older and have the coordination needed to avoid grating their fingers.
Next Bear and Bee help roll out and shape the pizza dough for the bases. I am still not sure where Bear got the idea that pizza dough needed to be thrown in the air! We roll the dough out on squares of baking paper to stop it sticking to the bench and to make it easier to transfer the bases to the pizza oven.
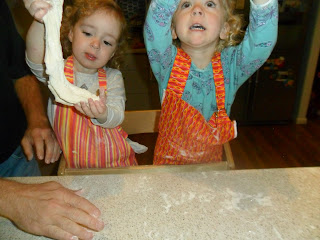 |
| Bee and Bear practising their pizza throwing skills |
Now all we need to do is put on the toppings we like and cook the pizzas for 7-8 minutes. If you are using ready-made pizza bases and a regular oven you will need to cook the pizzas for longer. For the pizza sauce we use a homemade version made from the tomatoes grown in our own backyard. I will write about these tomatoes and the pizza sauce recipe in a future post, so check back regularly.
 |
| Bee checking what dad is doing with the pizza toppings |
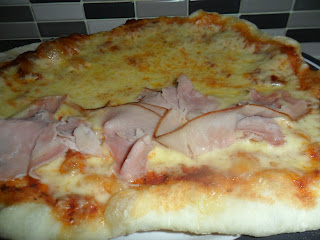
Bear and Bee’s favourite pizza – cheese and ham.
Here are the links to some more great homemade pizza recipes.
What is your child’s favourite pizza toppings?
V is for Vegie Pancake Parcels for The Kids Cook Monday
Whoa. It has been a long time since I have been able to do a post for The Kids Cook Monday. Not that we haven’t been cooking but since our last post our family has moved 1000 kilometres up the coast of Queensland. We are now renting a home and we also had trouble getting connected to the internet so I am only now getting a chance to reorganise the blogging side of my life.

Bear and Bee absolutely love pancakes and it is our go to dish for weekend breakfasts. Vegie Pancake Parcels combines the girls love of pancakes with my desire for us a family to eat at least 1 vegetarian meal a week. And breakfast for dinner is always a good thing.
You may notice that there aren’t a lot of photos of Bear (or Bee) helping to cook this recipe. Sometimes that happens. Bear was happy to help at the start but then got distracted by something Bee was doing. Normally Bear loves to help make the pancake batter. But not tonight. And that’s okay.
 |
| Bear chopping mushrooms. Love the concentrating look. |
 |
| Bear grating zucchini. |
Vegetable Pancake Parcels
Serves 4Download the printable recipe card for this recipe here.
Ingredients
1 1/4 cups plain flour
3/4 cup milk
2 eggs
20g butter, melted
a little extra butter, or canola oil spray, for greasing baking dish
3/4 cup béchamel sauce (I used a store bought bottled one for this recipe)
3/4 cup grated cheese
Filling
20g butter
2 medium potatoes, peeled, cut into 1cm pieces
200g sweet potato, peeled, cut into 1 cm pieces
1 medium zucchini, grated
1 medium carrot, grated
1/2 cup chicken stock
1/2 cup tomato passata
Directions
1. To make filling. Melt butter in a large frying pan over medium-high heat. Add potato and sweet potato and cook until lightly browned.
2. Add zucchini and carrot and cook for 3 minutes, stirring every now and then.
3. Add stock and passata and bring to the boil. Reduce heat to medium and allow to simmer uncovered for 10 minutes or until vegetables are tender. Remove from heat and allow to cool while making pancakes.
4. Preheat oven to 180o Celsius. Grease a large (20cm x 30cm) ovenproof baking dish.
5. To make pancakes. Place flour in a medium sized bowl. Whisk milk and eggs in a jug. Add milk mixture to flour and whisk until smooth.
6. Heat a medium sized frying pan over medium heat. Brush with a little of the melted butter.
7. Pour approximately 1/4 cup of pancake batter into pan and swirl to cover base.
8. Cook for 2 to 3 minutes or until bubbles start to appear on surface of pancakes. Turn pancakes over and cook for a further 2 minutes. Transfer to a plate.
9. Repeat with remaining batter.
10. Place 1 pancake on a chopping board or other flat surface. Top with 1/4 cup of filling. Roll pancake up and place in baking dish. You may like to fold the sides in as you are rolling the pancakes to help keep the filling in.
11. Repeat with remaining pancakes and filling.
12. Spoon the béchamel sauce over the parcels and sprinkle with grated cheese.
13. Bake for 10 minutes.
C is for Chicken Soup and Cheesy Flatbreads for The Kids Cook Monday
The seasons change very rapidly here. We are quickly moving from soups and stews to salads and barbecues in our meal planning but I couldn't resist trying this soup recipe when I spotted it in my favourite cooking magazine.
7. Fill each pita pocket half with some of the pizza cheese. Cook in sandwich press for 2 minutes or until cheese melts and bread is golden.
The chicken and barley soup is easy to prepare which makes it perfect for a weeknight dinner. While Bee stuck to helping wash the spinach leaves and preparing the cheesy flatbreads, older children could also prep the potatoes and shred the cooked chicken.
This soup was delicious and I will definitely be adding it to our winter meal plans next year. You could easily leave out the chicken and add some more vegies for a vegetarian meal.
Chicken and barley soup with cheesy flatbreads
Original recipe from Super Food Ideas
Serves 4
Ingredients
2 tablespoons olive oil
1 large leek, trimmed, halved, thinly sliced
2 tablespoons tomato paste
1 tablespoon fresh thyme leaves
3/4 cup pearl barley
2 litres salt-reduced vegetable stock
2 potatoes, skins scrubbed, cut into 1cm pieces
4 cups baby spinach leaves (the original recipe used silver beet)
1 cup shredded skinless barbecue chicken
2 whole meal pita pockets, halved
1/2 cup grated pizza cheese
Directions
1. Heat oil in large saucepan over medium heat. Add leek and cook, stirring, for 3 minutes or until it starts to soften.
2. Add tomato paste and cook for 1 minute.
3. Add thyme, barley and stock. Cover and bring to boil. Reduce heat and simmer for 40 minutes.
5. Remove pan from heat and stir in spinach and chicken. Season with salt and pepper.
7. Fill each pita pocket half with some of the pizza cheese. Cook in sandwich press for 2 minutes or until cheese melts and bread is golden.
9. Serve soup with cheesy flatbreads.
Subscribe to:
Posts (Atom)

