Showing posts with label kids lunch ideas. Show all posts

L is for Love Your Lunchbox

L is for Love Your Lunchbox

Now that Bear and Bee attend kindy I have decided to dedicate every Friday on our blog to Loving Your Lunchbox.  Lunchboxes and their contents can be the cause of much frustration in many households.

What goes in the lunchbox, what's not allowed in and what comes home uneaten can all be problematic and as Kylie from Octavia and Vicky said in her post on School Lunchbox Ideas 

"Then just when you think you’re on to a winner, your lovely child decides that they now hate their favourite lunch box choices."

There is a lot of information about lunchboxes and what to put into them available on the internet, so I will be endeavouring to bring you the best of these each Friday.  We will also be trying out some new recipes and some old favourites too of lunchbox foods that kids can help make.  And by bringing these ideas to you on a Friday hopefully you will have a chance to add some things to your shopping list, try out some new ideas on your kids over the weekend and get those lunchboxes organised for the next week.

To start this new weekly series off, here's a few of the recipes on our blog that would be great for lunchbox fillers.

Weetbix Slice

Choc Raspberry Muffins

Savoury Muffins
Vegie Cheese Puffs

Anzac Biscuits

Popcorn

Plus, here is two more good ideas for lunchboxes.

Childhood 101 20 Lunch Box Snack Ideas

I like this printable of 20 Lunch Box Snack Ideas from Christie at Childhood 101.  It's a great idea to print the list and hang it inside your pantry door.


If you want a lunchbox menu plan for the week go and have a look at MomablesMOMables is a kid friendly family meal plan that tackles school lunch and family dinner. It helps parents feed their kids a variety of meals they will love. Members receive 2 family sized meals (perfect for dinner) and 3 single lunch ideas. 
Click on the link above or the Momables image in our sidebar to check out the website.

What does your child like in their lunchboxes?


S is for Savoury Muffins for The Kids Cook Monday

Mondays are busy days for us with Bear and Bee having music classes and dance classes on the same day.  Add to that trying to catch up with friends for a playdate (and some adult conversation) and cooking for my weekly The Kids Cook Monday post and I know I have to be super organised to get through the day.

For our playdate today we decided to meet at a local playground for lunch so I decided the girls and I would cook something to take to share for lunch rather than having Bear and Bee help me cook dinner tonight.  With Bear's love of muffins and Bee's interest in anything that remotely resembles bread we decided on this recipe for savoury muffins from over at Roar Sweetly's blog. I know we are on a bit of a bread theme at the moment but if the girls will eat it I'm sticking to it!

S is for Savoury Muffins

I decided to change the recipe slightly to suit our family's tastes.  Rather than 1 cup of cooked bacon (which would have been way too salty for Bee) I increased the vegies to 1 and 3/4 cups and used 1/4 cup of chopped ham.  Also the original recipe called for the muffins to be baked for 20 minutes however I found this wasn't long enough. 


Not only did these Savoury Muffins taste great for lunch, hubby and I enjoyed them for dinner as a side to our slow cooker Beef and bean stew. I love comfort food!

Savoury Muffins
Original recipe from Roar Sweetly

Makes 12

Ingredients
1 1/2 cups self raising flour
2 cups grated cheese
1/4 cup finely chopped ham
1 3/4 cups of vegetables (We used peeled and grated zucchini, grated carrot and a small tin of corn kernels)
1 egg
3/4 cup milk

Directions
1. Preheat oven to 200 degrees Celsius.
2. Grease a 12 hole regular muffin tray.  I used a cooking spray to make the job easier. It's best not to line the tray with paper cases as they tend to stick to savoury muffins.

S is for Savoury Muffins
Measuring in the flour


S is for Savoury Muffins
Adding the cheese
S is for Savoury Muffins
In goes the ham

S is for Savoury Muffins
Plus the vegies
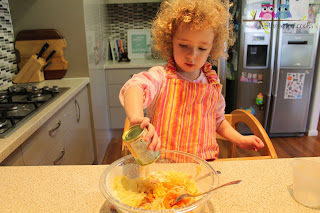
3. In a large bowl, mix together the flour, cheese, ham and vegetables.

S is for Savoury Muffins
Cracking eggs is something I get Bee and Bear to practise as much as possible

S is for Savoury Muffins
Combining the milk and egg


4. In a measuring jug or small bowl, mix together the milk and egg.

S is for Savoury Muffins

5. Add the milk mix to the flour mixture and gently combine.  Try not to over mix the muffin batter or the muffins will turn out tough and chewy.

S is for Savoury Muffins

6. Spoon the mixture evenly into each hole of the muffin tray.

S is for Savoury Muffins

7. Bake for 25 to 30 minutes or until golden brown and the muffins spring back when pressed lightly in the centre.

V is for Vegie and Cheese Puffs for The Kids Cook Monday

The original recipe for these Vegie and Cheese Puffs came from the Vegie Smugglers blog.  I have heard a fair bit about the Vegie Smugglers books but until I found Wendy's blog I hadn't had a chance to try out any of her recipes.  Now after spending some time looking through the blog I have a list of recipes to try and am considering purchasing her books and meal planner.

V is for Vegie and Cheese Puffs

I altered Wendy's recipe only slightly.  To avoid any green in the puffs we peeled the zucchini before grating it and use a finely grated carrot in place of the spring onions.  In an ideal world I wouldn't peel the zucchini because you lose a lot of nutrients this way but with my fussy eaters I will try anything.  And it worked!  Bear and Bee loved the puffs (hubby and I liked them too) and both had two each for dinner.  Bee especially liked them because in her words, 'they are like bread'.


Vegie and Cheese Puffs
Original recipe from Vegie Smugglers
Makes 16

Ingredients
½ cup milk
1 egg
½ tsp smoked paprika
1 zucchini, grated (peeled first if your kids hate green vegies)
1 small carrot, grated
2 cups grated tasty cheese
1 cup self-raising flour

Directions
1. Preheat the oven to 190 degrees Celsius.

V is for Vegie and Cheese Puffs

2. Line 2 baking trays with non-stick baking paper.  A tip I read recently was to scrunch up the baking paper before putting it on the tray.  That way it will lay flat - genius!

V is for Vegie and Cheese Puffs
3. In a large bowl, whisk together the milk and egg.

V is for Vegie and Cheese Puffs
Bear grating the peeled zucchini.
V is for Vegie and Cheese Puffs

4. Add the paprika, zucchini, carrot and cheese.

V is for Vegie and Cheese Puffs

5. Sift over the flour.
6. Mix well (it will become a thick paste).

V is for Vegie and Cheese Puffs
7. Dollop out portions onto the prepared trays.

V is for Vegie and Cheese Puffs

8. Bake for 20-25 minutes until golden brown and cooked through.

V is for Vegie and Cheese Puffs
We served our Vegie and Cheese Puffs as a side to Lamb and Barley Soup but they would also be great in lunchboxes (as Wendy mentions on her blog).

W is for Wraps


At the moment we seem to be experiencing a heat wave for spring.  With the day time temperatures unusually high for this time of year, we are already looking for light options for lunches in the threefootcook household. Bee’s reply lately to ‘what do you want for lunch’ has been chicken wraps so today I thought I would get Bee and Bear to make their own wraps.

Lunch wraps are a great recipe for children to make on their own with only a little assistance from you, mostly in the preparation stage.

I set out as many different ingredients I could think of on the kitchen bench and let each girl choose what they wanted to put on their wraps.  Bee chose peanut butter and Bear went out on a limb and chose peanut butter and sultanas!  This was actually a big step forward for Bear as both girls usually only have their bread and wraps plain with no toppings.  (By the way, Bee’s version of a chicken wrap is a crumbed chicken strip wrapped inside a plain flour tortilla).

To make wraps with your child is as easy as following five simple steps:

 Pick your wrap – flour tortilla (white, whole-wheat, rye, herb etc), corn tortilla, pita bread, lavash bread, or any other thin wrap you can find.
Spreading peanut butter onto tortilla for lunch wrap.

Spread on sauce or condiment – tomato sauce, bbq sauce, hummus, peanut butter, light cream cheese, cranberry sauce, hoisin sauce, jam, mustard, chutney, mayonnaise, yoghurt, salsa, and pesto.

Spreading peanut butter onto tortilla for lunch wrap.
Pick your fillings – ham, chicken, turkey, canned tuna, smoked salmon, hard-boiled egg, leftover roast beef, falafels etc.

Add extras – lettuce, tomato, grated carrot, cheese, mushrooms, sliced capsicum, sultanas, grated apple, banana, cottage cheese, baby spinach, pickles, salad onion, coleslaw, avocado, cucumber, olives etc.
Adding sultanas to lunch wrap.
Grating carrot for lunch wrap.
Bee was just practising here - she didn't acutally want to put carrot on her wrap

Don’t overfill the wrap. Leave about 1/3 to ¼ free at the bottom to allow for easy folding. Fold and enjoy.

Some filling combination suggestions:
  • Peanut butter, sultanas, grated carrot
  • Peanut butter and banana
  • Vegemite and grated cheese
  • Chicken, tasty cheese and pesto or mayo
  • Tandoori chicken, yoghurt, tomatoes and baby spinach
  • Tuna, lettuce, sprouts and cheese
  • Turkey, bacon, cranberry sauce
  • Ham, cheese and pineapple
  • Mexican mince, salsa, capsicum, cheese and lettuce

What is your favourite lunch wrap filling?

Q is for Quesadillas


Quesadillas (keh-suh-dee-uhs ) feature regularly on our lunch menu or even as snacks in the three foot cooks household.  They are a great recipe for kids as they are simple to prepare and quick to cook. Quesadillas are basically cheese melted inside a tortilla.  They are a nice change to grilled cheese on toast (another lunch standby) and the fillings can be adapted to suit all tastes.  This makes them acceptable to picky eaters and a great way to use up leftovers. 

Bear and Bee’s favourite filling version is the simplest – grated tasty cheese.  Usually this consists of me placing a flour tortilla on a microwave safe plate, sprinkling on some grated cheese, topping it with another tortilla and zapping it in the microwave for 1 minute.  Wait until it cools a little, slice up like and pizza and enjoy with some tomato sauce.

Today I thought I would change it up a little and use our contact grill (George Foreman grill) to cook the quesadillas which makes them nice and toasty on the outside.  I have also seen recipes for quesadillas cooked in an oiled frypan.  I think this just makes them a greasy and unhealthy recipe for kids.  If you want to use a frypan to cook the quesadillas, use a dry non-stick pan.

I gave Bear and Bee a few ingredients in addition to the grated cheese to see if they would include anything else if given the choice.  There was sliced ham, sliced tomato and grated carrot. However, they stuck with just the cheese.

Here is how to make your quesadilla.

Preheat a sandwich press or contact grill.
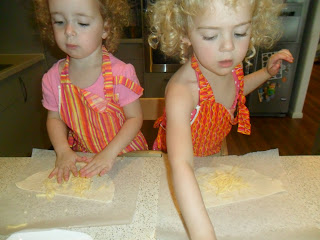
Place one half of a large flour tortilla on top of a square of baking paper.  If you have mini tortillas you can use 2 – 1 for the top and 1 for the base.
Place tortilla on baking paper for quesadilla
Look Mum, it's a boat!
 Sprinkle on some cheese.
Sprinkle grated cheese on top of tortilla for quesadilla
Lots of cheese for the quesadilla
Lots and lots of cheese.

Add your toppings.  All proteins like mince and chicken need to be precooked.
Place the other tortilla on top.
Place another tortilla on top of fillings for quesadilla

Add another square of baking paper and place the whole lot on the grill.  Cook for 5 minutes or until the cheese has melted and the outside is slightly golden brown.
Allow to cool for a minute or two and slice into wedges.
Quesadillas simple recipe for children
Enjoy

Other fillings you might like to try:
  • Shredded cooked chicken, pesto, roasted red capsicum, cheese
  • Leftover mince, red kidney beans, cheese
  • Cheese and spinach
  • Tuna, corn and cheese
  • I even came across a recipe for a sweet quesadilla that I will definitely be trying – sliced strawberries, choc hazelnut spread and slice banana, with a sprinkling of icing sugar once cooked.

What is your child’s favourite lunch recipe?

F is for Father's Day Lunch


After a great start to Father’s Day with French toast kebabs for breakfast, I had to find something equally delicious that Bear and Bee could help cook for lunch.  Once again, my inspiration came from the Martha Stewart site (I like her almost as much as I like Donna Hay).  Hubby’s favourite lunch would be hamburger and chips but he will have to wait awhile to have that for Father’s Day if the girls are going to help with the cooking.  Instead I found these Chicken-Fajita Tostadas and they sounded just right.  Enough chopping, mixing and assembling to keep Bear and Bee happy and not too much cooking for me on a Sunday. 

Ingredients
1 medium onion, thinly sliced
1 red capsicum, thinly sliced
2/3 cup corn, I had some frozen corn cobs that I cooked and sliced off the kernels.  You can also use fresh or canned if that’s what you have available. 
1 cup fresh salsa (chopped tomatoes, basil, olive oil and lemon juice). You could use a pre-prepared one if it is available
1 ½ tablespoons olive oil
Salt and pepper
1 cup cooked and shredded chicken breast
4 tortillas, I used mini flour tortillas as I know that Bear and Bee will eat them.  Corn tortillas would be great.
½ cup grated tasty cheese
2 tablespoons natural yoghurt

Method
Preheat oven to very hot – 230oC.
Prepare salsa if using homemade version.  This is a good step for your child to do while you are waiting for the oven to preheat.
Young girl using scissors to snip herbs for the salsa
Snipping herbs with scissors for the salsa.

Young girl juicing half a lemon for homemade salsa
Juicing half a lemon to add to the salsa mix

Combine onion, capsicum, ¼ cup salsa (and fresh corn if using) in a bowl with ½ tablespoon of oil and season with salt and pepper.  Place on a foil lined baking tray and cook in oven for 15 – 20 minutes tossing occasionally.  
Vegie mix for chicken fajita tostadas

Add chicken and precooked or canned corn to tray, stir to combine and return to oven for 5 minutes or until heated through.
I completed these steps before Bear and Bee started helping again with the recipe.

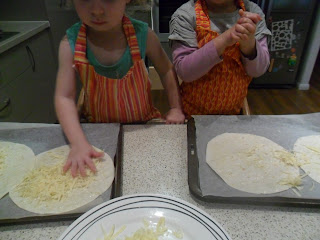
Place tortillas onto baking trays lined with baking paper.
Preparing the tortillas for the tostadas

Brush each tortilla with a little of the remaining oil and sprinkle on some grated cheese. 
Sprinkling grated cheese onto tortillas for tostadas recipe

Bake in the oven for 5 minutes or until golden brown on the edges and cheese is melted.
Top each tortilla with some of the chicken mixture and remaining salsa. 
Spooning fajita mix onto tortillas for tostadas recipe

Finish off with a spoonful of yoghurt.
Adding yoghurt to chicken fajita tostadas
Chicken fajita tostadas

What are you planning for Father’s Day?